
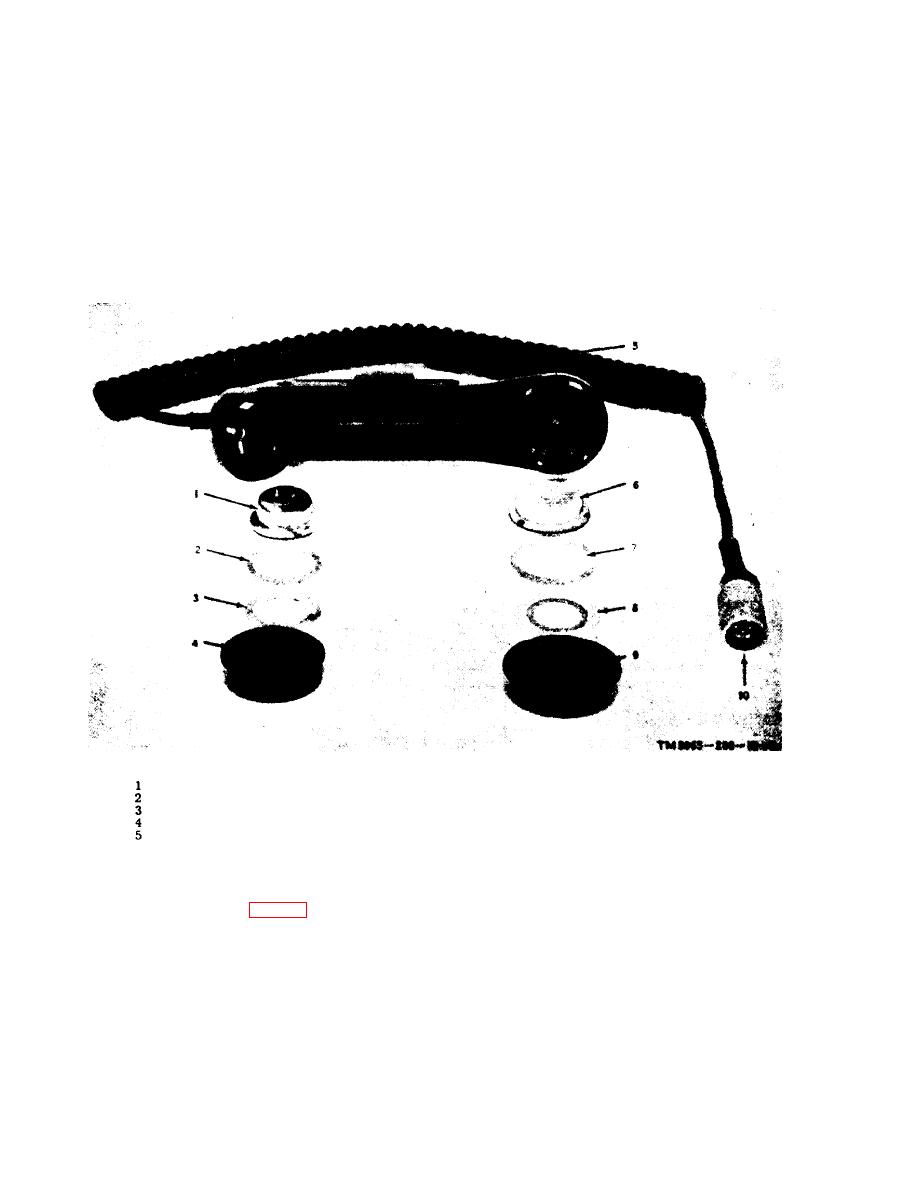
(2) Remove the earphone shield (8), the
the pins with the contacts may dam-
preformed packing (7), and the ear-
age the element.
phone element (6) from the handle.
(2) Replace the preformed packing (7)
over the earphone element (6).
d. Replacing Earphone Element.
(3) R e p l a c e the earphone shield (8)
(1) Place the earphone element (6) in
over the preformed packing.
the handle with the pins aligned
with the contacts in the handle.
(4) Replace t h e receiver-transmitter
cover (9) and tighten it by turning
Caution:
Failure to properly align
it clockwise.
Microphone element (MK1)
6
Earphone element (HT1)
P r e f o r m e d packing (MP7)
7
Preformed packing (MP8)
Microphone shield (E2)
8
Earphone shield (E1)
M i c r o p h o n e mouthpiece (MP6)
9
Receiver-transmitter cover (MP4)
10
O-ring (MP2)
Cable assembly (W1)
e. Lubrication of O-ring in Connector U-
Compound (FSN 5870-221-5903) to the O-
ring to permit it to roll in its groove. Apply
inside the body of the U-229/U. It provides
it as often as necessary to obtain smooth con-
a seal when the H-189/GR is connected to a
nect and disconnect of the U-229/U.
radio set. The O-ring may become lost or
Caution: DO NOT allow any of the
damaged when it is being connected or dis-
lubricant to be applied to the con-
connected. To prevent this, apply a small
tacts.
amount of Dow-Corning Co. DC-4 Silicone


 Previous Page
